Cetus ESP32 Web UI
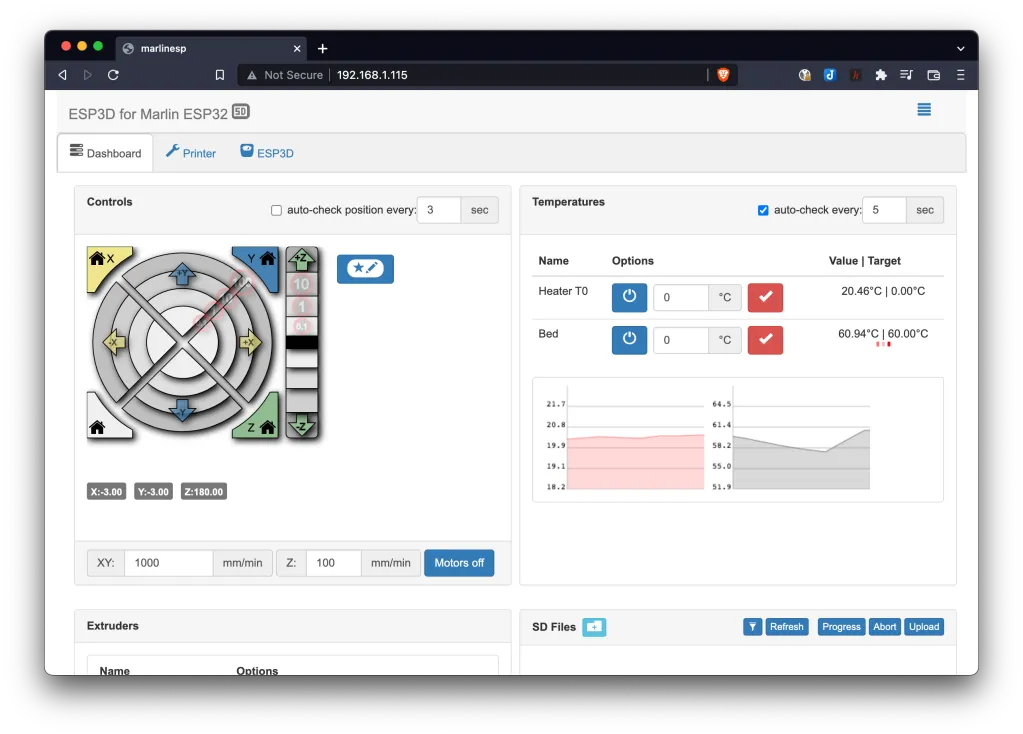
For many the web interface will probably be the most attractive feature of the TinyFab ESP32 CPU. I eventually got it setup so that I could upload prints to the SD card at reasonable speeds without having to actually remove the card
The Web UI comes from a separate open source project, technically two: https://github.com/luc-github/ESP3DLib and https://github.com/luc-github/ESP3D-WEBUI
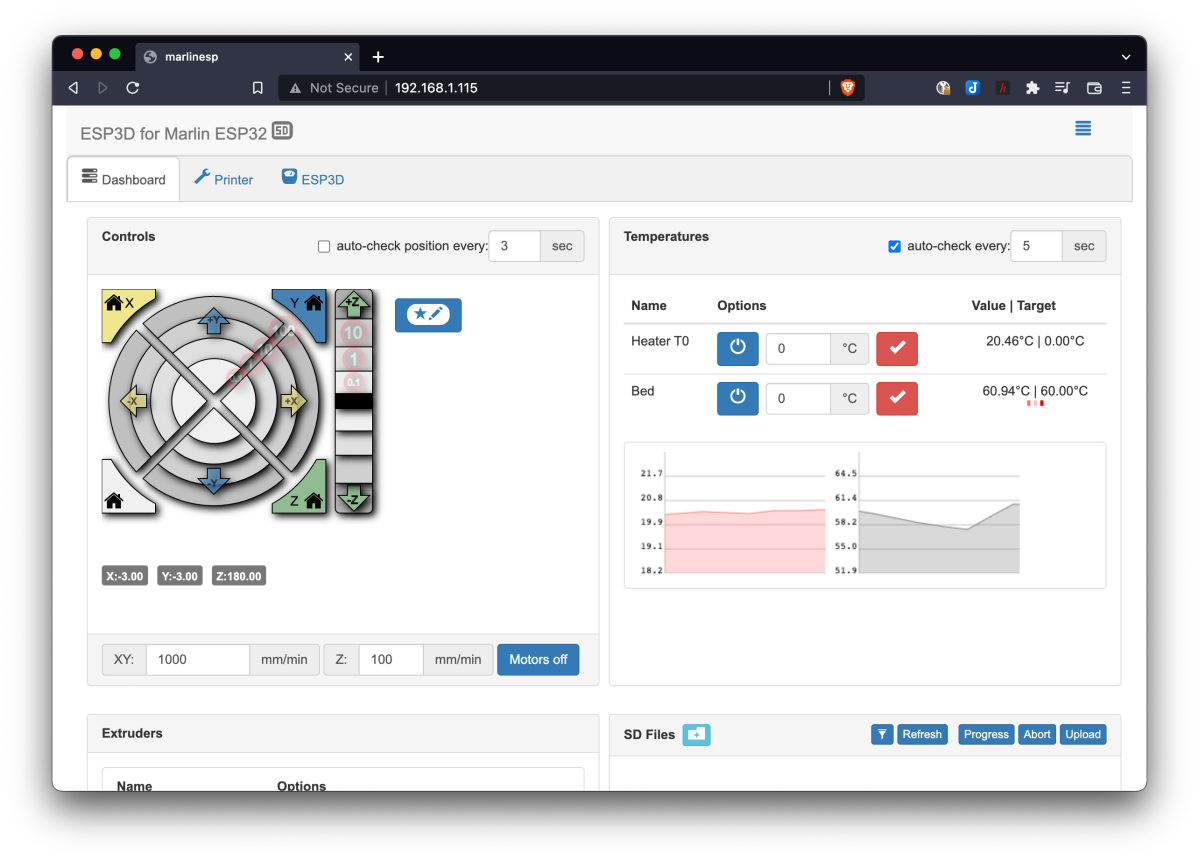
Overview (in pictures)


Assorted screenshots
Overall thoughts
| Liked | Could be better |
|---|---|
| Control/monitor from anywhere | Gaps in temp monitoring, e.g. while waiting for hotend to reach temp |
| Responsiveness | No real print progress indicator |
| Fast SD card uploads | |
| OTA firmware updates |
Not as complete/fancy as OctoPrint but does all the basics. I started using it to upload to the SD card after I had a print failure while printing over usb/serial (I think it was a hardware issue with my PC, but made me see the benefits of printing off the SD card), since serial uploads are painfully slow and the SD card on the Cetus MK3 isn't readily accessible
A progress/estimated time remaining indicator would be the one feature I'd love to see added
Setup
Connecting to WiFi
The ESP32 can only connect to 2.4 GHz networks
You will need to be connected to the printer via USB and open a serial terminal (I use CoolTerm on Mac but PuTTY or screen or any other terminal is fine). Baudrate should be 115200, everything else
shouldbe OK as defaults
To connect to WIFI I used the following sequence of commands:
- [ESP100]<SSID>
- [ESP101]<password>
- [ESP102]DHCP
- [ESP110]STA
- [ESP444]RESTART
On restarting you should see connection progress logged to the serial terminal. If successful it will say connected and print the IP address
(By default the device should be called marlinesp on your network)
Once you have the IP address simply connect to the printer by entering the IP address into a browser
If required, user name/password will be admin/admin by default
<insert screenshot here>
As an event approaches, it is worth considering how details related to cosplay props will affect the complete look. With practical wear in mind, it helps to assess details related to wig colour selection together with fit and fabric. To shape a complete look around details related to photoshoot preparation, cosplay shoes for long events can help narrow the options for a specific purpose. To stay comfortable throughout the event, a balanced view of details related to beginner costume choices can support both detail and comfort.
For reference, all the serial control codes are documented in ESP3DLib/docs/Commands.txt:
The fabric's breathability can make a shirt suitable for indoor and outdoor use. The design of the back panel can improve airflow. Readers encountering Ajax away shirt may be looking for guidance on version differences and practical trade-offs, rather than a simple product description. The right shirt balances personal style, comfort and the occasion it will be worn for.
Note:
1 - add space to separate parameters

* Display command list
[ESP]

* Set/Get STA SSID
[ESP100]<SSID>

* Set STA Password
[ESP101]<Password>

* Set/Get STA IP mode (DHCP/STATIC)
[ESP102]<mode>

* Set/Get STA IP/Mask/GW
[ESP103]IP=<IP> MSK=<IP> GW=<IP>

*  Set/Get AP SSID
[ESP105]<SSID>

* Change AP Password
[ESP106]<Password>

* Set/Get AP IP
[ESP107]<IP>

* Set/Get AP channel
[ESP108]<channel>

* Set/Get radio state which can be STA, AP, OFF
[ESP110]<state>

* Get current IP
[ESP111]

* Get/Set hostname
[ESP112]<Hostname>

* Get/Set HTTP state which can be ON, OFF
[ESP120]<state>

* Get/Set HTTP port
[ESP121]<port>

* Get SD Card Status
[ESP200]

* Get full EEPROM settings content
but do not give any passwords
[ESP400]

*Set EEPROM setting
position in EEPROM, type: B(byte), I(integer/long), S(string), A(IP address / mask)
[ESP401]P=<position> T=<type> V=<value>
Description:		Positions:
HOSTNAME_ENTRY 		"ESP_HOSTNAME"
STA_SSID_ENTRY 		"STA_SSID"
STA_PWD_ENTRY 		"STA_PWD"
STA_IP_ENTRY 		"STA_IP"
STA_GW_ENTRY 		"STA_GW"
STA_MK_ENTRY 		"STA_MK"
ESP_RADIO_MODE 		"WIFI_MODE"
AP_SSID_ENTRY 		"AP_SSID"
AP_PWD_ENTRY 		"AP_PWD"
AP_IP_ENTRY 		"AP_IP"
AP_CHANNEL_ENTRY 	"AP_CHANNEL"
HTTP_ENABLE_ENTRY 	"HTTP_ON"
HTTP_PORT_ENTRY 	"HTTP_PORT"
TELNET_ENABLE_ENTRY "TELNET_ON"
TELNET_PORT_ENTRY 	"TELNET_PORT"
STA_IP_MODE_ENTRY   "STA_IP_MODE"

*Get available AP list (limited to 30)
output is JSON or plain text according parameter
[ESP410]<plain>

*Get current settings of ESP3D
output is plain text
[ESP420]

* Set ESP State
cmd is RESTART / RESET
[ESP444]<cmd>

* Change admin password
[ESP550]<password>

* Change user password
[ESP555]<password>

* Format ESP Filesystem
[ESP710]FORMAT

* FW Informations
[ESP800]<plain>